Blog

recipes

the best chocolate cupcakes with peanut butter frosting

chocolate banana
These are the cupcakes from my cousin’s baby shower I hosted 4 years ago (I used yellow food colouring paste for the Winnie the Pooh theme).

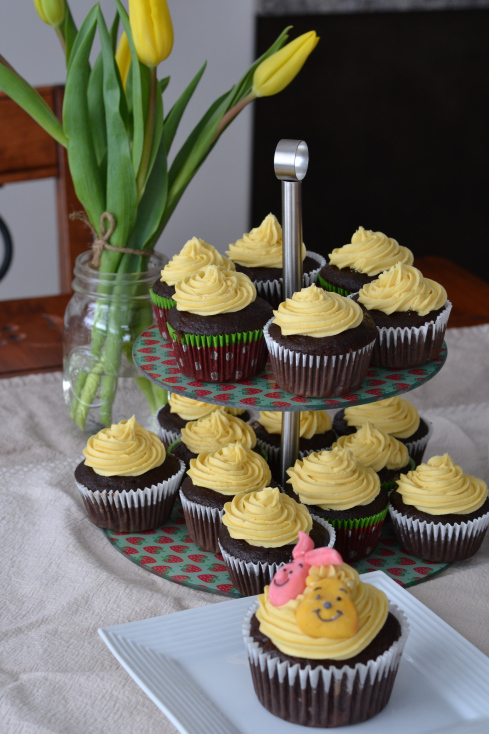
No joke – these are awesome. They are so deliciously decadent, yet light and moist, and perfect in every way if you’re a fan of the classic combo of peanut butter and chocolate. Hands down the most baked cupcake in this household and everyone at any age who has tasted them goes back for another! My first introduction to this cake was when I turned 30 and one of my dearest friends Abby came to surprise visit me, peanut butter chocolate cake in hand.  I still have memories of the first bite – probably honestly one of the best cakes I’ve ever had, fancy restaurants included. When I asked her for the recipe she said it was from a blog called Smitten Kitchen. Ever since I’ve been on that blog for various baking recipes and I’m never disappointed.


chocolate jumbo
This is a jumbo sized one I made a few years ago for one of my daughter’s birthdays.

I have tweaked and played around with this recipe to recreate it’s scrumptiousness into a cupcake. I promise you will love it.  Recently I hosted a baking playdate with some friends who wanted to learn how to make and ice cupcakes from scratch. We all had our share of cupcakes that day and it’s safe to say when they shared with their family and friends everyone wanted the recipe.

IMG_0327.jpeg
Practice practice practice! Here’s my friend using a piping bag and icing tip for the first time ever – the first few are tricky and always look a bit lopsided – by the 5th or 6th she was a pro! We forgot to take a picture though!!


I guarantee you won’t be sad you made 28 cupcakes! Yes…28 cupcakes. If you’re hosting a much smaller party and do not want left-overs (trust me…they freeze well so you do!) – then go ahead and cut the recipe in half! I have done that before and it makes about 15.

what you need:

chocolate cake

  • 2 cups all purpose flour
  • 2 1/3 cups sugar
  • 3/4 cups Dutch process cocoa powder
  • 2 tsp baking soda
  • 1 tsp salt
  • 1 cup coconut oil, melted
  • 1 cup plain greek yogurt
  • 1 1/2 cups water
  • 1 tsp vanilla
  • 2 tbsp white vinegar
  • 2 eggs

peanut butter frosting

  • 1 cup unsalted butter at room temperature
  • 4 cups icing sugar (maybe a bit more)
  • 1/3 cup smooth natural peanut butter
  • 1 tsp vanilla
  • 2 tbsp milk
mmm – that first bite!

what to do:

  1. In a large bowl, whisk together flour, sugar, cocoa powder, baking soda, and salt. If you have a stand mixer, use the whisk attachment. In a small bowl, mix together vanilla, water, and vinegar.
  2. Add melted coconut oil (must be melted into liquid form) and yogurt, mix to combine.
  3. Slowly add water mixture so that it incorporates and a smooth batter forms.
  4. Add one egg at a time. I like to crack my eggs into a small bowl first to avoid accidentally dropping shells into the batter bowl.
  5. Mix well – scraping down the bowl with a spatula once or twice to make sure everything is mixed well.
  6. Preheat oven to 350 F.
  7. Line cupcake tins (muffin tins) with regular sized cups – I used 3 trays and baked them at the same time with my convection setting. You can also do this in batches (i.e. one tray at a time!)
  8. Fill cups only 3/4 way with batter – do not overfill as it will rise too far up and then they won’t be as pretty and have that cupcake look when you frost them. Tip: Make your life easier by transferring batter to a jug with a spout so that you can pour batter into the cups easily.
    chocolate cupcakes
    When they rise, you want them within the cup so that the frosting looks nice! Take care not to overfill or they will come out looking like muffins. (no one wants a muffin top…😏)
  9. Bake in centre racks for 15-18 minutes – this really depends on your oven so go shy with the time and check every minute after it beeps. You can do the toothpick trick (it’s ready when the toothpick comes out with soft crumbly crumbs but not sopping wet) – or you can tap the top of the cupcakes gently with your finger and if it bounces back up it’s ready. If it’s still raw in the middle it will stick to your finger / appear wet. Tip: Cupcakes will continue to bake even when you remove them from the oven – so even if you’re not sure it’s probably going to be done by the time they are cool enough to handle! Always go shy on baking time to avoid dry and over baked cake.
  10.  Once they are cool enough to handle, transfer them to a cooling rack to cool completely. This is a soft cake so handle with care! I sometimes use two forks to gently and gingerly get them out of the tray and then get them to the cooling rack.

While they cool…get the frosting ready!

  1. Using your handheld electric whisk or stand mixer with whisk attachment, beat butter until very soft, smooth and fluffy, a paler colour (almost white) compared to how it looked as a brick (more yellow).
  2. Scrape the sides of the bowl with a spatula and beat one more time to be sure all the butter is whipped.
  3. Gradually, about 1 cup at a time, add the icing sugar and beat well – it should be light and fluffy. Add 1 tbsp milk, vanilla and peanut butter. Beat well.
  4. Check consistency and taste – if you want a creamier frosting, add a bit more milk. If you want firmer, add another 1/4 cup icing sugar.
  5. Frost your cupcakes and enjoy! A fun way to frost them is to use a piping bag and a special tip. Tip: Easiest way to fill the bag is by placing it into a tall heavy sturdy glass, and remember to twist or elastic the top so that when you squeeze, the icing comes out the tip and not into your hands at the top of the bag!
  6. ENJOY! Freeze any left overs in an airtight container and bring to room temperature to enjoy another day.  Really important to enjoy at room temperature so that the frosting is dreamily soft and lickable!
  7. IMG_9861
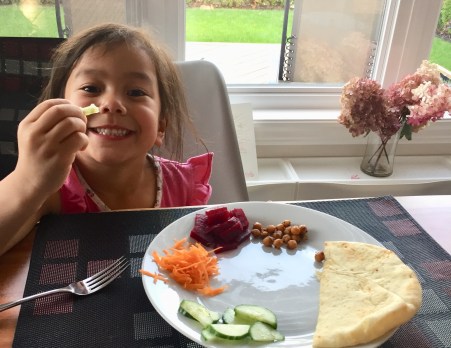
    My little bubbalubs enjoying his first cupcake on his 1st birthday a month ago. 
entree, recipes

chickpea tacos with a middle eastern twist

IMG_9460

This is one of those dishes that keeps you going in for the next bite! It’s loaded with freshness, fun spices and flavours that satisfy all the tastebuds. The hardest part really is the prep because after you have the fillings all set up in their own bowls, you lay out all the prepared ingredients and let the diners do the work. It’s super fun to build your own taco, especially for kids (or, like my middle child boss does, keep it all separate!). I think this keeping things separate might be an age thing…my oldest piepie used to be like that but recently she has been happy to eat sandwiches and mixes things up on her plate!

IMG_9462-1
boss and her love of keeping things separate

I have to thank my husband’s aunt for giving me this dinner idea – when I saw her last week she was telling me about how she has been having success in finding delicious recipes that are vegetarian and vegan friendly.  She was raving about a chick pea taco she made from the blog Feasting At Home.  When I looked it up tonight I did not have everything the recipe called for, but I was able to adapt my own twist on it using what I had on hand.

For the Tzatziki I use a brand we love and almost always have in our fridge (Skotidakis) but of course you can make your own! When you’re in a crunch though, one less thing to make on a weeknight is a win! If you’re looking for vegan you can substitute with hummus. You can use traditional corn or flour tortillas for the taco shell part – all I had at home was left over naan bread so I cut them in half and warmed them up in the oven.

IMG_9463.jpg
piepie building her taco

I hope you enjoy these as much as we did! It certainly hit the spot for dinner at our place on this beautiful Autumn Monday.

Tip: it’s a good idea to do some of the prep ahead of time. For example, I cooked the beets and chickpeas on the weekend when I had more time and then just kept them in the fridge to use for the week. Of course, you can also use canned chickpeas and find cooked beets in the grocery stores. But it’s a better bang for your buck when you buy the dried chickpeas and the whole beets in a bag!

serves: about 3-4 people

what you need:

  • 2 medium carrots
  • 1 large yellow onion
  • 1 pinch of sugar or agave nectar
  • 2 red beets, cooked
  • 1 cup grape tomatoes
  • 1 very small clove of garlic
  • 1/2 lemon
  • 1 handful cilantro
  • 1 handful of chives
  • 1 1/2 cup cooked chickpeas
  • 1 cucumber
  • 1 tsp cumin
  • 1 tsp onion salt
  • 1 tsp za’atar (a blend of spices, if you cannot find it you can leave it out)
  • cooking oil (I use grape-seed oil)
  • tzatziki (store-bought or make your own)
  • taco shells, tortillas or naan bread

what to do:

  1. Prepare vegetables by washing them all well. Create shredded carrots by using a cheese grater. Slice cucumbers in half, then cut into thin half moons. Place in individual serving bowls.
  2. Thinly slice onion then sauté with about 2 tsp of cooking oil in a non-stick pan, until gently caramelized (lightly browned). Add a pinch of sugar or a small drizzle of agave to give it a little sweetness. Set onions aside in an individual serving bowl.
  3. Cut grape tomatoes into quarters and mix with juice of 1/2 lemon, a pinch of salt and pepper, finely chopped cilantro, chives. Toss together and set aside.
  4. In the same onion pan, heat up 1 tbsp cooking oil on medium-low and add spices (cumin, onion salt, za’atar) – once you smell the aromas of the spices (about 30 seconds) – add the chickpeas and toss until all coated and warmed through. Place chickpeas in their own serving bowl.
  5. Prepare your taco shells (warm up soft ones in the oven, or bake the crunchy kind as indicated on the package).
  6. Lay out all the individual topping bowls on the table and invite everyone to build their own tacos. I like to start mine with a thick spread of Tzatziki so that the chickpeas, shredded carrots, tomatoes, beats, cucumbers and onions have something to stick to.
  7. Enjoy!
baby food, recipes

baby’s ginger carrot blend

IMG_7844
fit for a mini foodie!

Baby food doesn’t have to be bland and boring! Introduce your baby to new flavours (even spices!) gently so that they can transition more easily later on to enjoy dinners with you as toddlers and kids!

Here, I’ve used two thick slices of ginger to give the carrot, pea, and lentil puree a little warmth and soothing effect for the tummy. It also helps with digestion!

what you need:

*makes about 2 16oz mason jars

**tip: if you are freezing some, make sure there is plenty of room in your jar so that it doesn’t crack from expansion in your freezer

  • two chunky slices of fresh ginger
  • 3 large carrots
  • 1/2 cup red lentils
  • 1/2 cup frozen green peas
  • water

what to do:

  1. Peel carrots and ginger. Cut carrots roughly for quicker cooking. Add to medium sized cooking pot.
  2. Rinse lentils, add to carrots and ginger.
  3. Cover with cold water, just enough so that the carrots are 3/4 submerged.
  4. Using an instant pot , cook on high pressure for 12 min. Alternatively, you can cook this stove top – bring to a boil on high heat, then simmer gently on low for 20 minutes, until carrots are very tender (you may need to add water as you simmer).
  5. Once the carrots are tender, remove from heat and carefully remove ginger slices.
  6. Add frozen green peas. Stir.
  7. Using a handheld immersion blender, puree until desired smoothness (you know what your baby can handle!).
  8. Store in mason jars. Enjoy!


recipes

apple cider vinaigrette

DSC_0498

Okay this is one of those dressings that can go on anything – it’s so tasty that you’ll love whatever is coated with it. Tangy, but slightly sweet, this addictive dressing keeps you going in bite after bite. I have a friend who buys it at Farm Boy all the time – all she did at a playdate was toss it with mixed greens and a few chopped peppers, and it was such a delicious salad!  You can definitely find different kinds of apple cider vinaigrette at the store but if you are like me and have a giant jug of apple cider vinegar from Costco, making it yourself is way more economical! And also – the ingredients are super simple and non-perishable! It will keep in a mason jar in your fridge for weeks.

Summer time is here! What a great season to enjoy all the fresh veggies and leafy greens (currently our favourite at home is a mix of baby arugula and baby kale). Be sure to make extra dressing so that you always have a dressing on hand, whenever you need it.

what you need:

  • 6 tbsp apple cider vinegar
  • 8 tbsp grape seed oil (or similar oil – something very mild in flavour)
  • 4 tbsp raw local honey (try to find local honey, as it has the best benefits for your health)
  • a few twists of freshly ground black pepper
  • two pinches of salt

what to do:

  1. Put all your ingredients in a mason jar and shake really well. Use immediately or store in fridge for later use. Enjoy!
DSC_0496
Left over grilled steak finds a new home in this simple salad of greens, avocado and tomatoes. The dressing pulls it all together!
CSC_0501
One of piepie’s favourites is this vinaigrette on bean salad – it holds up well for school lunch!


yoga

25 min Yoga for Happy Hips

Hips – they don’t lie! Do you feel tight in your hips? Ask yourself:

  • Can I sit comfortably cross legged on the floor?
  • Can I sit in a chair and cross one ankle over the opposite thigh, keeping my back straight?

The hip joint is a ball and socket joint, and should be able to move in all directions.  Most of us who have tight hips find sitting cross legged uncomfortable or impossible.  Many chalk it up to old age but this isn’t true! Just like strength, flexibility comes with practice and is an ongoing journey. It is incredibly important for injury prevention. I really like to use the slip and fall example – if you suddenly slip and fall you’re more likely to recover quickly or reduce/prevent injury because your body has been stretched that way before. One of the many many reason why YOGA is so good for us!

This 25 min hip flow targets all muscles layers of the hip (there are several!!). It may feel difficult the first few times, especially if you are particularly tight in the hips. Repeat it daily for a week and stick with it, you will be surprised at how your body responds and how good it feels to open up those hips.